Hey guys - as promised, I’m sharing my notes on creating what @gua742 calls the “Mother Of All Nodes” or MOAN. Since I get laughs and eye rolls every time I call it that, can we figure out another name for this thing? 
OK, so here are the parts I picked up (hat tip to @gua742 for sharing his list):
-12v solar panel [$19]
-12v solar controller [$10]
-12v lead acid battery [$17]
-Lead acid battery charger [$9]
-12v cigarette lighter [$8]
-12w USB car charger [$13]
-900mhz omni-directional antenna [$99]
-N male to UHF female adapter [$4]
-UHF male to SMA female adapter [$5]
-10cm SMA male to female antenna extender cable [$8]
-Waterproof outdoor case [$40]
-Conduit hanger #2 [$2]
-2 screws, 2 washers, velcro, drill, drill bits, screw drivers, and various other tools commonly found in a tool box
Now, it probably would’ve made more sense to get an N Male to SMA female connector since less parts = simplicity = less likelihood something doesn’t work.
Once you have the parts, assembly really is simple. I removed all foam from the box save the lid, as that helped keep the battery in place. Velcro goes on the bottom of the various parts, then drill a couple holes (antenna SMA connectors and wire from solar panel), and mount the solar panel + antenna brackets.
When mounting the antenna, I’d recommend mounting a bit higher than the hole you’ve drilled for the SMA connectors. This allows you to have some distance between the antenna and hole, so your coax isn’t crimped due to lack of space.
Wiring is relatively easy as well, given the solar controller clearly calls out each of the 3 items you’re connecting: solar panel, battery, and whatever you’re charging (in this case, the cigarette lighter) as well as the + and - terminals. For the solar panel, I measured enough wire so it could move freely and make it inside the box to the solar controller (with some slack), then cut the remaining wire+alligator clips. I then used the wire+alligator clips to connect the battery to the solar controller. The cigarette lighter had its own wires, so those were easily connected to the solar controller. Oh, and charge the battery overnight before you use it, just so there’s no question as to whether you’ve wired something wrong, or how much charge the battery actually has to power your MOAN.
Cracking open the goTenna mesh is not easy!! Holy cow, the flash-welding or whatever these guys do, keeps that thing locked up tiiiiight! That’s great for wet weather, but not so bueno for h/w hacking. We ended up using a dremel to crack open the seam in the plastic shell, which, when paired up with the other things we tried, ruined it.
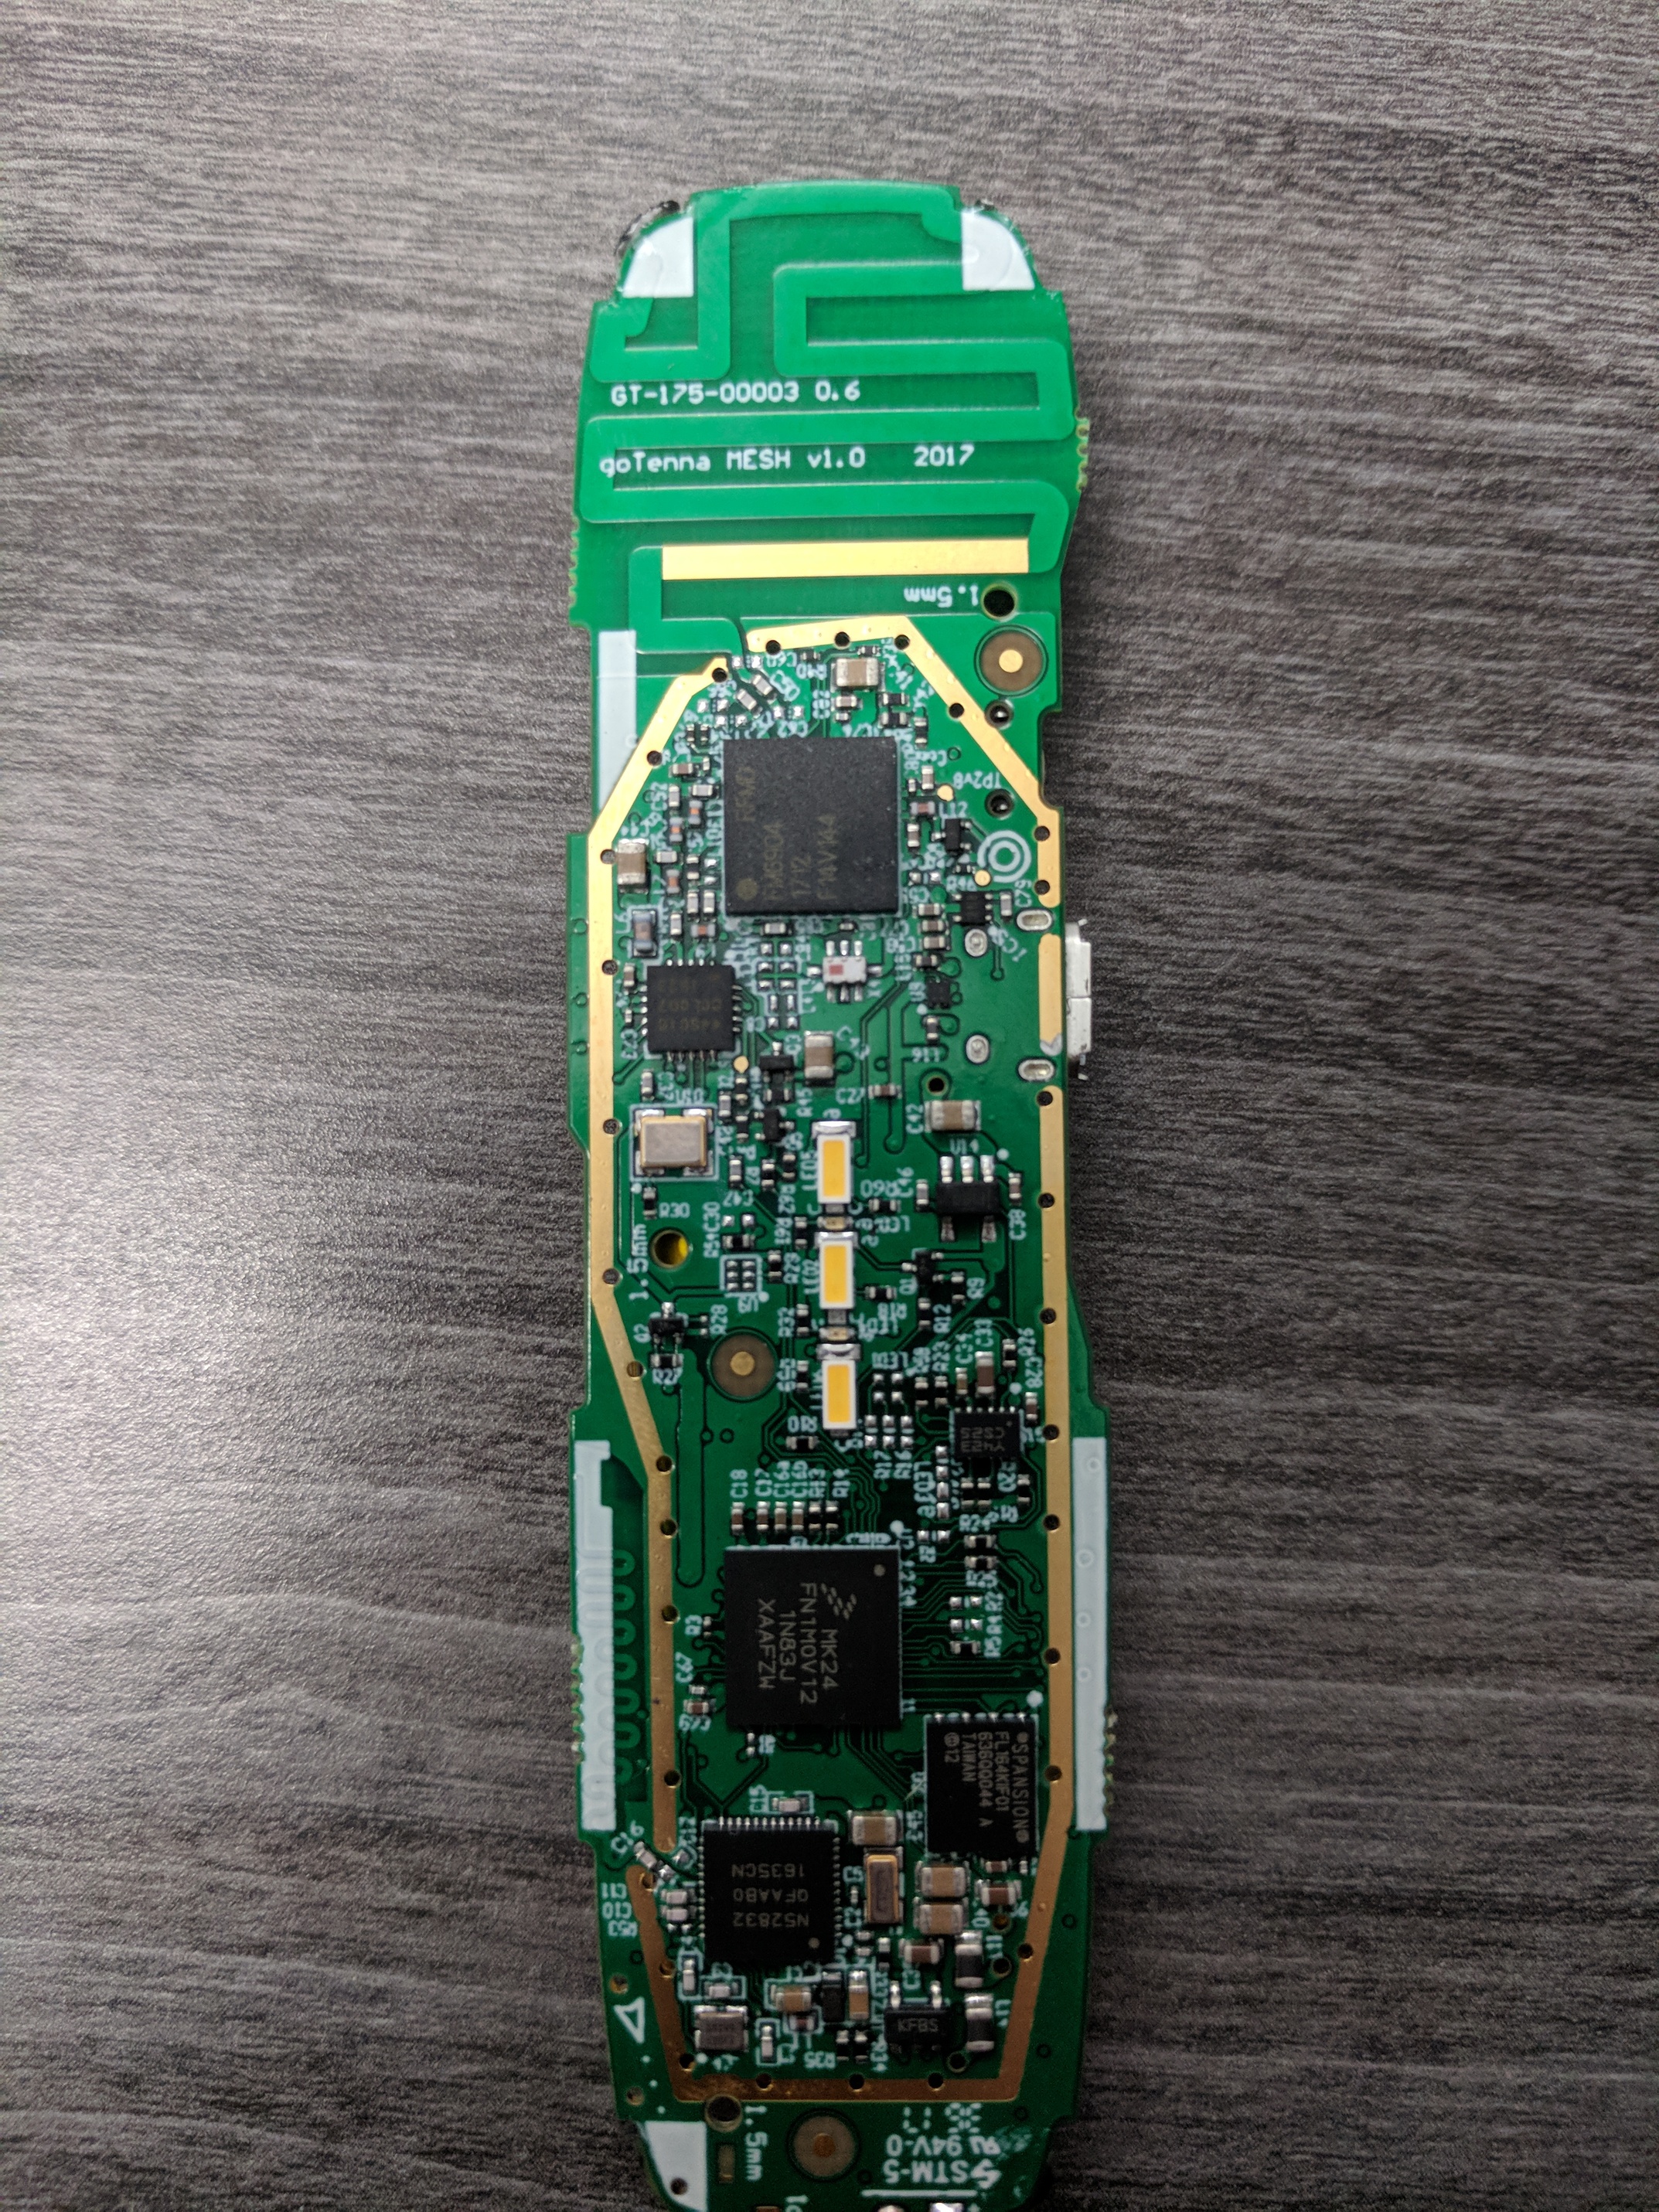
Once inside, we realized the power button had fallen off, and it didn’t appear as though it was soldered on too tightly. So, be careful when cracking yours open - it’s easy to jack something if you’re not delicate. Here’s what the board looks like once you’ve got it opened up:

It’s not too hard to find the antenna and ground, although figuring out how to wire a tiny SMA coax cable to both is somewhat interesting. We pulled off the business end of the cable, and delicately soldered a tiny piece of wire to the ground (ie. the shielding around the coax), then soldered to the ground on the board. I say delicately, because too much heat on the ground shielding could melt through the shielding and jack the entire wire. From there, the main antenna was connected to the printed antenna on the board. If you’re looking at this photo, the soldering on the left is the antenna, and the right is to the ground:

Once that was done, we wrapped the top of the board with some Kaptan tape and placed the goTenna in the box, ready to wire up with everything else.
From there, it’s really just powering the unit on and testing it out. As you can see, things in there are somewhat organized, but the goTenna unit is still flailing about, nekkid. I’d love to 3D print a case for it, if someone has the skills to whip that up!
Also, it’s worth noting that I’m not an electrician or electrical engineer, so before you go playing with electricity, talk to someone that actually knows what the heck they’re doing 
Not unlike @gua742 I still need to weatherproof this thing, but will hold off on doing that until I can properly test it out and see if I’ve hosed it up somehow. Speaking of which, if you see something that I screwed up, do let me know, so I can fix it.


