We know a lot of you have been experimenting with rooftop/solar powered relays. Here is our recommendation based on our work in NYC with the RISE program.
Simply turn on a mesh unit and set it on relay mode, then adhere the unit to the side of the pak with double sided tape, place solar panel in the pak, plug the solar panel into the mesh unit with any standard micro-USB cable. Once you have the node assembled, you can use plastic zip ties or other fastening method to mount the node on your roof. Make sure to position the bag in a way that it will absorb the most sunlight possible throughout the day.
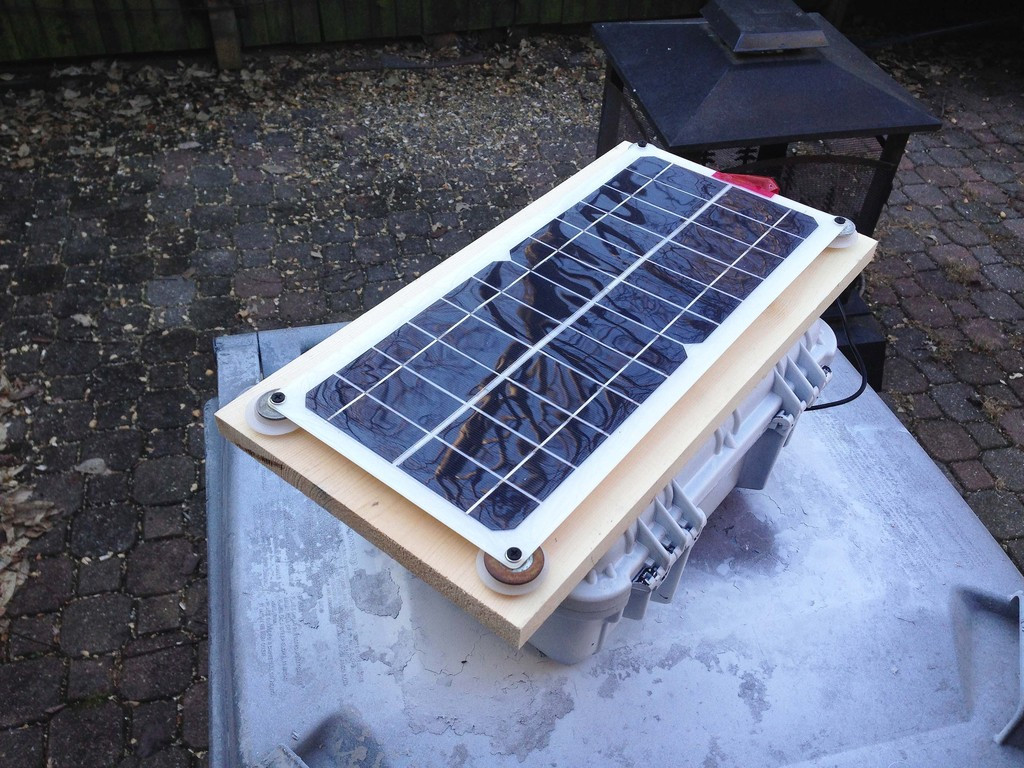
This pic shows one of the earlier versions. All put the power down low on the roof, with the goTenna Mesh device in the orange water-tight box mounted remotely and fed by a USB cable down to the batter pack in the case below. This arrangement used an 18 v panel I got for free due to a shipping error from overseas. It was notable for me never getting the MPPT charge controller set right and thus frying a couple of battery packs.
I later subbed in one of these standard “MkIII” relays that have a case with attached panel, differing from the standard ones I build for Urbana in that the GTM was remote mounted in the orange case as depicted above. The charger case with solar panel sits in the wooden cradle that was previously occupied by the 18 v panel. Here’s a look inside one with the standard internally-mounted GTM.
Power is the weak link here and it’s been tripping me up lately after a long run of relative success. Maybe it was the damp, extra gloomy winter here? Not really sure, but the batch of nodes I left out for testing purposes on the patio all winter suffered some serious corrosion issues at the various connecting points: at the 5 V convertor on the back of the solar panels I’m using which supplies a USB power output to the battery pack: at the battery pack’s micro-USB input port, and at the GTM’s micro-USB power input port.
The common issue was the NEW battery packs that I thought would replace the one I cited above that has worked quite well for the most part. The pack I linked to isn’t immune to these troubles, but seems to have minimal issues. It may be an issues with the sourcing of the various USB jack components on the packs…
Then there are the 5 V power outputs on the panels. They seemed to soak up water and hold it, so most were in-op after I checked them. I eventually determined that I could peel them off and directly tap the panel output. Problem is this jumps the charge voltage from regulated 5 V to ~15 V… The battery pack above will handle that charge. Don’t go much higher, as most are onl;y rated to 20 V, if that high.
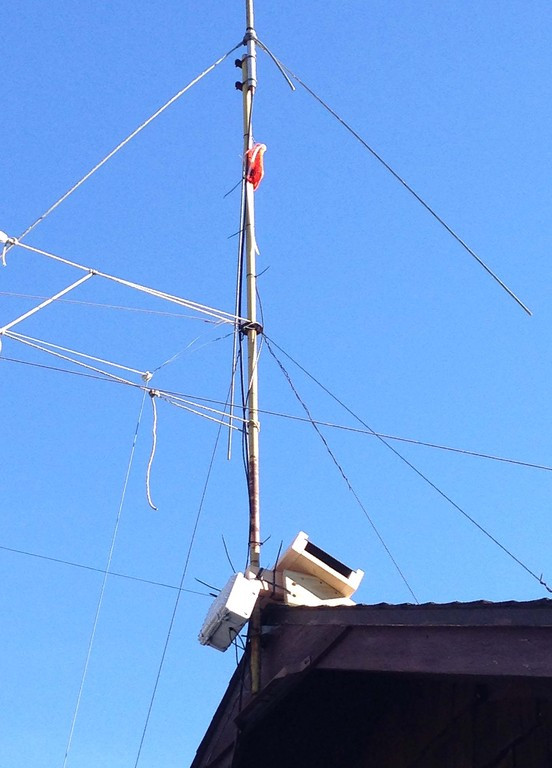
In Nothern Idaho I’ve had good luck keeping a GTM using an old but possibly high quality 20W panel connected to the stuff in the photo. It uses a 14AH AGM battery, a USB buddy from Powerwerx and a charge controller from Battery Tender. The one pictured was placed on 11/15/18 on a rooftop. I’ve had a few issues keeping the Android tablet connected via bluetooth inside the building; somthing to do with the tablet’s power saving options. I usually check it once a week or so but there have been several instances where the tablet and GTM were not connected and the GTM was in pairing mode with the white light continually flashing. The lowest I’ve seen the GTM battery is 95%. The panel doesn’t get an excessive load of snow in the winter due to a nearly vertical angle and being near the peak of a poorly insulated building. I have not had to reset this one since installed in November of 2018. It has relayed and received an estimated 1000 messages in that time.
Hey, nice setup! I’m curious about your GTM bluetooth. Have you upgraded to our latest firmware yet? You can do this by updating the goTenna Mesh app and pairing your goTenna to your end user device.
curious, how do you KNOW you relayed X amount of messages? there is an SDK but a screenshot of that would be helpful to see even if it’s non-released SDK/app you made, etc.
Sorry for the confusion. I don’t have a custom app for relay count. My guess is an estimate only based on range testing I’ve done while monitoring node count thru confirmed messages. For example I keep a GTM inside the building below the pictured rooftop relay. If I message the lower GTM my message usually has to use the rooftop relay and I see I’ve used one mesh node in the goTenna app. The same goes when I’m testing inside the building. It usually takes the help of the rooftop relay to reach other relays on the GTM network. I usually test around 5 mountain top relays at least three times a day each. My estimate of 1000 messages relayed could be off but the point was the GTM set up as pictured just keeps on doing what it’s supposed to! It would be nice to see an actual count to offer some encouragement to those that put in the work of maintaining relays but it also could be a discouragement if no one is using them. I’m encouraged each day I see those green circles showing the GTM network is up and running using nothing but the power of the sun!!
I need to set up a mountain top relay node. SInce I do not want to climb up to the node very often I obviously was planning solar power to a battery. I was wondering if this unit would be adequate. Thanks in advance for any help
If you’re south of 40 degrees North, that should work in most cases where you get a location with good sun exposure. North of that latitude, you want to consider bigger is better. Right now there’s plenty of daylight and a relatively short night. In mid-December, you want things stacked in you favor when it comes to power to avoid those irritating revisits to reboot.